Friday, December 11, 2015

How to Create a Network Share Via Samba Via CLI

Procedures


All commands must be done as root (precede each command with 'sudo' or use 'sudo su').
  • Install Samba
    • sudo apt-get update
      sudo apt-get install samba
  • Set a password for your user in Samba
    • sudo smbpasswd -a <user_name>
      • Note: Samba uses a separate set of passwords than the standard Linux system accounts (stored in /etc/samba/smbpasswd), so you'll need to create a Samba password for yourself. This tutorial implies that you will use your own user and it does not cover situations involving other users passwords, groups, etc...
        Tip1: Use the password for your own user to facilitate.
        Tip2: Remember that your user must have permission to write and edit the folder you want to share.
        Eg.: 
      • sudo chown <user_name> /var/opt/blah/blahblah
        sudo chown :<user_name> /var/opt/blah/blahblah
  • Create a directory to be shared
    mkdir /home/<user_name>/<folder_name>
  • Make a safe backup copy of the original smb.conf file to your home folder, in case you make an error
  • sudo cp /etc/samba/smb.conf ~
  • Edit the file "/etc/samba/smb.conf"
    sudo nano /etc/samba/smb.conf
    • Once "smb.conf" has loaded, add this to the very end of the file:
      
      [<folder_name>]
      path = /home/<user_name>/<folder_name>
      valid users = <user_name>
      read only = no
      Tip: There Should be in the spaces between the lines, and note que also there should be a single space both before and after each of the equal signs.
  • Restart the samba:
    sudo service smbd restart
  • Once Samba has restarted, use this command to check your smb.conf for any syntax errors
  • testparm
  • To access your network share
          sudo apt-get install smbclient
          # List all shares:
          smbclient -L //<HOST_IP_OR_NAME>/<folder_name> -U <user>
          # connect:
          smbclient //<HOST_IP_OR_NAME>/<folder_name> -U <user>
    To access your network share use your username (<user_name>) and password through the path "smb://<HOST_IP_OR_NAME>/<folder_name>/" (Linux users) or "\\<HOST_IP_OR_NAME>\<folder_name>\" (Windows users). Note that "<folder_name>" value is passed in "[<folder_name>]", in other words, the share name you entered in "/etc/samba/smb.conf".
    • Note: The default user group of samba is "WORKGROUP".

Thursday, September 10, 2015

Photoshop CS Problem Freezes at “Reading text global resources…Done

To delete the New Doc Sizes file:
— In Windows:
1. Make sure that Windows Explorer shows hidden files and extensions:
a. In Windows Explorer, choose Tools > Folder Options.
b. Click the View tab in the Folder Options dialog box.
c. In Advanced Settings, select Show Hidden Files And Folders.
d. Deselect Hide Extensions For Known File Types.
e. Click OK.
2. In Windows Explorer, locate the New Doc Sizes.psp file in the Documents and Settings/ [user name] /Application Data/Adobe/Photoshop/8.0/Photoshop CS Settings folder.

3. Right-click the New Doc Sizes.psp file and choose Delete from the pop-up menu.

Wednesday, September 2, 2015

HTTPS in Mikrotik Hotspot

genrsa -des3 -out ca.key 4096
req -config d:\openssl\openssl.cnf -new -x509 -days 3650 -key ca.key -out ca.crt
genrsa -des3 -out server.key 4096
req -config d:\openssl\openssl.cnf -new -key server.key -out server.csr
x509 -req -days 3650 -in server.csr -CA ca.crt -CAkey ca.key -set_serial 01 -out server.crt

download link for openssl 

 1. Creating self –signed our own CA (Certificate Authority)

First we generate the RSA Private Key in order Create CA (Certificate Authority). Certificate is containing our identity and organization details. For more faster just paste it on openssl command prompt one by one (look at the number of this command lines!).
?
1
2
genrsa -des3 -out ca.key 4096
req -config C:\Users\agus\Desktop\openssl\openssl.cnf -new -x509 -days 3650 -key ca.key -out ca.crt
The final goal in this step is creating “ca.key and ca.crt”. “C:\Users\agus\Desktop\openssl\openssl.cnf” is the path where the openssl.cnf  file is located. “Common Name : hotspot.wiswaweb.com” is a dns name of the hotspot server profile that used.

2. Creating self-signed hotspot server certificate

We generate the RSA Private Key, Certificate Signing Request (CSR) and finally self-signed hotspot server certificate itself.
?
1
2
3
genrsa -des3 -out server.key 4096
req -config C:\Users\agus\Desktop\openssl\openssl.cnf -new -key server.key -out server.csr
x509 -req -days 3650 -in server.csr -CA ca.crt -CAkey ca.key -set_serial 01 -out server.crt

After this we can close openSSL command prompt, and now we have three hotspot server certificate files, that is server.key, server.csr, and server.crt.

3. Upload  and Import the self-signed certifate hotspot server files

Copy that tree server files and place into 1 folder, just named as key. Now we are going to upload the three files in folder key, we can also use winSCP, fireFTP, etc,  to make easier to upload and put the certificate files against another files on the router.

After upload the files we are going to import them to the router as the self-signed sertificate on the router system. Using winbox click System>Certificates. On the tab certificates, press import and and we look for the files that have been uploaded, as shown like the right picture above.  First we have to import server.crt, then server.key. In this case we just require server certificate the file that has extension .crt and the key files. We can see the information identity details of the self-signed certificate.

4. Change the configuration of the hotspot server mikrotik

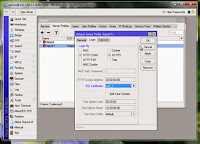
After import the certificate, now we have certificate on the router system with the name cert_1. Go to the hotspot server profiles and activate HTTPS option Login by and use SSL certificate cert_1.  Don’t to activate SSL service port on the IP Service List that now using cert_1 certificate. Look at the pictures below!

Now we can see how the Self-Signed Certificate redirect https login page works on the hotspot clients. When I use 2 options login by “HTTP and HTTPS” with SSL Certificate “cert_1
The clients type : google.com, youtube.com, bloger.com, all the kind web server that use 2 type connections (HTTPS and HTTP) or the web server that just only have HTTP access, such wiswaweb.com. It’s no problem, the client could be redirected to login page https://hotspot.wiswaweb.com/login?...
The clients using the complete url : https://www.google.com/,  https:// youtube.com /,  https:// bloger.com. that means the clients use https access for the kind web server. In this case the clients will meet the security warning with add exception choice,  before could be redirected to login page https://hotspot.wiswaweb.com/login?...
The clients type : facebook.com, github.com and other web server that very strict just only use HTTPS connections. In this case the clients will meet the security warning with the notification only valid for  https://hotspot.wiswaweb.com/login?...