req -config d:\openssl\openssl.cnf -new -x509 -days 3650 -key ca.key -out ca.crt
genrsa -des3 -out server.key 4096
req -config d:\openssl\openssl.cnf -new -key server.key -out server.csr
x509 -req -days 3650 -in server.csr -CA ca.crt -CAkey ca.key -set_serial 01 -out server.crt
download link for openssl
1. Creating self –signed our own CA (Certificate Authority)
First we generate the RSA Private Key in order Create CA (Certificate
Authority). Certificate is containing our identity and organization
details. For more faster just paste it on openssl command prompt one by
one (look at the number of this command lines!).
1
2
genrsa -des3 -out ca.key 4096
req -config C:\Users\agus\Desktop\openssl\openssl.cnf -new -x509 -days 3650 -key ca.key -out ca.crt
The final goal in this step is creating “ca.key and ca.crt”. “C:\Users\agus\Desktop\openssl\openssl.cnf” is the path where the openssl.cnf file is located. “Common Name : hotspot.wiswaweb.com” is a dns name of the hotspot server profile that used.
1
2
| genrsa -des3 -out ca.key 4096req -config C:\Users\agus\Desktop\openssl\openssl.cnf -new -x509 -days 3650 -key ca.key -out ca.crt |
2. Creating self-signed hotspot server certificate
We generate the RSA Private Key, Certificate Signing Request (CSR) and finally self-signed hotspot server certificate itself.
1
2
3
genrsa -des3 -out server.key 4096
req -config C:\Users\agus\Desktop\openssl\openssl.cnf -new -key server.key -out server.csr
x509 -req -days 3650 -in server.csr -CA ca.crt -CAkey ca.key -set_serial 01 -out server.crt
After this we can close openSSL command prompt, and now we have three hotspot server certificate files, that is server.key, server.csr, and server.crt.
1
2
3
| genrsa -des3 -out server.key 4096req -config C:\Users\agus\Desktop\openssl\openssl.cnf -new -key server.key -out server.csrx509 -req -days 3650 -in server.csr -CA ca.crt -CAkey ca.key -set_serial 01 -out server.crt |
After this we can close openSSL command prompt, and now we have three hotspot server certificate files, that is server.key, server.csr, and server.crt.
3. Upload and Import the self-signed certifate hotspot server files
Copy that tree server files and place into 1 folder, just named as key.
Now we are going to upload the three files in folder key, we can also
use winSCP, fireFTP, etc, to make easier to upload and put the certificate files against another files on the router.
After upload the files we are going to import them to the router as the
self-signed sertificate on the router system. Using winbox click System>Certificates. On the tab certificates, press import and and we look for the files that have been uploaded, as shown like the right picture above. First we have to import server.crt, then server.key.
In this case we just require server certificate the file that has
extension .crt and the key files. We can see the information identity
details of the self-signed certificate.
After upload the files we are going to import them to the router as the self-signed sertificate on the router system. Using winbox click System>Certificates. On the tab certificates, press import and and we look for the files that have been uploaded, as shown like the right picture above. First we have to import server.crt, then server.key. In this case we just require server certificate the file that has extension .crt and the key files. We can see the information identity details of the self-signed certificate.
4. Change the configuration of the hotspot server mikrotik
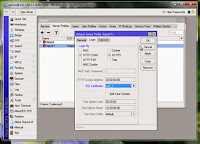
After import the certificate, now we have certificate on the router system with the name cert_1. Go to the hotspot server profiles and activate HTTPS option Login by and use SSL certificate cert_1. Don’t to activate SSL service port on the IP Service List that now using cert_1 certificate. Look at the pictures below!
Now we can see how the Self-Signed Certificate redirect https login page
works on the hotspot clients. When I use 2 options login by “HTTP and HTTPS” with SSL Certificate “cert_1”
The clients type : google.com, youtube.com, bloger.com, all the kind web server that use 2 type connections (HTTPS and HTTP) or the web server that just only have HTTP access, such wiswaweb.com. It’s no problem, the client could be redirected to login page https://hotspot.wiswaweb.com/login?...
The clients using the complete url : https://www.google.com/, https:// youtube.com /, https:// bloger.com.
that means the clients use https access for the kind web server. In
this case the clients will meet the security warning with add exception
choice, before could be redirected to login page
https://hotspot.wiswaweb.com/login?...
The clients type : facebook.com, github.com and other web
server that very strict just only use HTTPS connections. In this case
the clients will meet the security warning with the notification only
valid for https://hotspot.wiswaweb.com/login?...
Now we can see how the Self-Signed Certificate redirect https login page works on the hotspot clients. When I use 2 options login by “HTTP and HTTPS” with SSL Certificate “cert_1”
The clients type : google.com, youtube.com, bloger.com, all the kind web server that use 2 type connections (HTTPS and HTTP) or the web server that just only have HTTP access, such wiswaweb.com. It’s no problem, the client could be redirected to login page https://hotspot.wiswaweb.com/login?...
The clients using the complete url : https://www.google.com/, https:// youtube.com /, https:// bloger.com.
that means the clients use https access for the kind web server. In
this case the clients will meet the security warning with add exception
choice, before could be redirected to login page
https://hotspot.wiswaweb.com/login?...
The clients type : facebook.com, github.com and other web
server that very strict just only use HTTPS connections. In this case
the clients will meet the security warning with the notification only
valid for https://hotspot.wiswaweb.com/login?...


No comments:
Post a Comment