UPDATE mytable SET Total = Pieces * Price;Wednesday, December 27, 2017
Sunday, September 17, 2017
Saturday, September 16, 2017
Certificate
/certificate
add name=ca-template common-name=myCa key-usage=key-cert-sign,crl-sign
sign ca-template name=myCa
add name=hotspot-template common-name=hotspot
sign hotspot-template ca=myCa name=hotspot
###Make server certificate trusted
set [find name=hotspot] trusted=yes
add name=ca-template common-name=myCa key-usage=key-cert-sign,crl-sign
sign ca-template name=myCa
add name=hotspot-template common-name=hotspot
sign hotspot-template ca=myCa name=hotspot
###Make server certificate trusted
set [find name=hotspot] trusted=yes

UME
PPTP - Use GRE
UDP-8 byte
TCP - 20 byte
L2TP - 8 byte
PPP - 4 byte
IP - 20 byte
PPTP - 56 byte
PPP Bridge Control Protocol (BCP)
UDP-8 byte
TCP - 20 byte
L2TP - 8 byte
PPP - 4 byte
IP - 20 byte
PPTP - 56 byte
PPP Bridge Control Protocol (BCP)
Sunday, July 9, 2017
Mikrotik Wireless Mode
AP Bridge
- AP and Bridge (it can disable bridge for AP only mode)
- 2007 clients for AP
- 1 for bridge
- license level 3 (minimum) for bridge
Station
- It can connect both of AP and Bridge
- It can connect any AP devices
- If you want to bridge with other AP, you need to use Station Pseudobridge.
Station Bridge
- It can connect only Mikrotik devices.
Station Pseudobridge Clone
- It is use with client mac
Alignment Only
- Link test with sound beep
Nstreme dual slave
- It is for Nstreme Dual with 2 wireless cards. It can get full duplex.
Station WDS
- It can use as bridge.
AP Bridge with WDS
- create bridge with any name
- go to WDS
- choose bridge name and dynamic mode
- it will be network loop and STP spanning tree protocol need to use
- the best solution is adding access-list and connect list only one AP
- another solution is using Static WDS.... New WDS and put the MAC of desire AP
- If you will use different SSID, you can enable Ignore SSID
WDS Slave
- It can connect to AP bridge and different frequency But it will adopt the frequency from AP bridge.
Mesh Network (the best solution for WDS)
- add mesh interface
- use with WDS mode to Dynamic Mesh and choose mesh interface as bridge
- Static Mesh can also use.
- 2 type of
Virtual AP
- max 127 aps
- multi ssid with one network
- use IP firewall between 2 Virtual APs
Wednesday, May 3, 2017
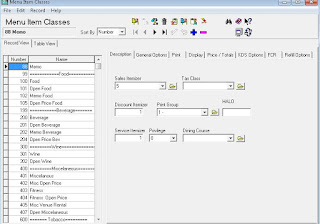
Micros to Opera Report interface
1) Descriptor
2) Tracking
3) Menu Class --- Sale Itemizer
4) check in interface table
2) Tracking
3) Menu Class --- Sale Itemizer
4) check in interface table

Wednesday, January 11, 2017
Adding printer in Micros POS
Adding a remote printer is a bit involved but here you go.
Physical setup
1) There are 2 ports labeled IDN1 and IDN2 on the back of the printers. The new remote will be daisy chained off the bar terminal's printer using these ports. The cable from the workstation will go into one port on the check printer, the cable to the new remote will go into the other one. It doesn't matter which port you use, they're on a common bus line.
2) The IDN ports use RJ11 jacks, not RJ45's. The wiring is straight through pin for pin.
3) There's a bank of dip switches on the back of the printer. #'s 4, 3, 2 & 1 set the ID for the printer.
Its binary, with #4=1, #3=2, #2=4 & #1=8.
Programming Changes
1) set the new printer up as a device.
POS Configurator/Devices tab/Devices button.
General tab
Device Type: roll printer
Network Node: your bar workstation
Printer Definition Tab
Interface Type: IDN
Printer Type: select your printer type
Line Feed/Column: copy these from a kitchen printer setup
Printer Interface Tab
IDN ID: the dip switch setting from the printer
Com Port: 4
2) set the printer up as an order device
POS Configurator/Devices tab/Devices button.
General tab:
Add the printer name
Header: select one or leave blank
Device: the device you just set up
Backup: I'd use the bar's check printer
Redirection Device: the device you just set up
Options Tab:
Copy all settings from a kitchen printer setup
3) make/modify a print class
POS Configurator/Sales tab/Print Classes button
Look for a Bar print class. If they have one find the order device
you just set up in the Remote Devices list and check it.
Uncheck previously checked Remote Devices for the Bar print class.
4) tell the workstations they can use the new printer
POS Configurator/Devices tab/User Workstations button
Order Devices Tab
Go to each workstation that will be printing to the new device and check it in the order device list.
Obviously, make sure this is done off-hours and make a backup before starting. Start/run "runbackup -n"
Subscribe to:
Posts (Atom)